Sunday, February 19, 2012

Raccoons and what you need to know.

I have not posted for about 9 months and I apologize for not having done this sooner.  I had a run in with a raccoon that left my family, my garden and my close friends in a stressful situation that should have never happened.  I did not want to write about it while I was still emotional and so I decided to wait until I was comfortable sharing this information with the gardening community.  Please do not proceed with reading this if you are squeamish.   There.  That was my warning.

In late October I was canning grape juice with a brand new steam juicer that I had purchased to enhance my food storage ability.  My friend Jeremy had been over and we had shared a few beers and stories.  I like to keep my windows open to the back porch while canning and juicing because of all of the steam and the heat.   Jeremy had left and I was actually logging into my account to write an article about the steam juicer and preserving juices. (I will write an article about steam juicing and how wonderful it is later as this is just incidental to the events that transpired that chilly evening.)

I had my dog at my feet and was listening to the rattle of the pressure cooker with quarts of green pork chili rattle and hiss, the sound of the bubbling in the steam juicer and the water bath canner all doing their  thing when I heard an unexpected sound rustling through the grape vines on my deck behind me.  Since my dog was at my feet, and this animal was to big to be a bird, I was startled.  I went to the door and turned on the porch light.  I opened the door to see a very, very large raccoon.  I unfortunately did not see it before my dog had already leapt out onto the porch.  This raccoon was neither shy or easily startled.  I brazenly went right for my dog making sounds that I had never heard from an animal of this size since a run in with a porcupine when growing up in the mountains as a teen.  I was able to pull my dog off of the raccoon and get her back into the house.  I shut the door, and watched as this unwelcome visitor now paced in front of my door and windows back and forth looking for a way into my house.

I poked my head out and tried to scare it away and it just squared off in front of me.  I went to get my wife. I showed her the creature and told her that it had attacked April and that it would not leave.  I made a decision that it could be rabid due to it's boldness and aggressiveness, and decided that it needed to be sent in for testing.  I went down stairs and grabbed my compound bow and a few arrows. I did not have time nor did I even think about putting broad heads onto the arrows so I was armed with field tips and knew that I would have to be very accurate.  I went out the side door and approached the animal still waiting outside my door.  I knocked the arrow, drew and snuck up to about ten feet away.  It was about 1 a.m. at this point and it was pitch black.  The raccoon was now on the banister next to my door just within the edge of the light being cast by the dim compact fluorescent bulb and so the best target was it's glowing eyes.  I released and hit the animal right through the right eye.  I relaxed perhaps a little to soon as the raccoon now with an arrow completely through it's head ran straight at me screaming in anger or pain I don't know which.  I quickly knocked another arrow drew and shot hastily landing this one through its neck and chest stopping it and killing it almost instantly.

I was really shaken up.  I had no intention of having my peaceful evening interrupted by what turned out to be a thirty five pound raccoon and it's intentions toward my grapes, my dog and then me.  I bagged up the animal and called animal control the next morning.  The officer came out and I told her what had happened and she thanked me and told me they would call with the test results.  She said it would cost me an extra $100 to test for worms and distemper.  I agreed to pay the extra amount and hoped for the best as she drove off.

I received a call that following Monday from the veterinary clinic with some really chilling news.  The raccoon had tested positive for a round worm called Baylisascaris procyonis or the raccoon roundworm.  


I am simply going to give a couple of links now.  READ THESE IF YOU GARDEN NEAR RACCOON POPULATIONS!


http://wwwnc.cdc.gov/eid/article/9/12/03-0039_article.htm
http://www.michigan.gov/dnr/0,4570,7-153-10370_12150_12220-27261--,00.html
http://en.wikipedia.org/wiki/Baylisascaris


The real problem is, that I had been eating produce from my garden after spraying off unknown (later turned out to be raccoon feces from my flatwork.  This potentially contaminated my garden, soil and vegetables.  It is therefore crucial that you maintain a vigil for raccoons and make sure to use good counter measures such as coyote urine to deter raccoons from your property and to look out for raccoon latrines.  If you should find a raccoon dropping, make sure to treat the area with fire or boiling water in order to kill any eggs that could be in that area.  Only handle the droppings with disposable gloves and treat them as if they were toxic waste. 


Every person who ate produce from my garden needed to go onto a regimen of albendezol.  This dosage cost my family about $2300 and was very unpleasant presenting digestive issues and dizziness for about a month. 


Every person needs to be aware of this threat and should consider raccoons to be a biohazard.  Please take my advice during this next gardening season and be aware of this little known threat. 


Saturday, January 29, 2011

Check List for Late Winter

There are several things that need to be done over the next three to four weeks. Planning now will help space out work over a reasonable amount of time.  The items on this list are time sensitive and very necessary for spring fruit set, and prevention of disease.

The following schedule will give good general guidelines to plan your late winter preparations.  Keep in mind that this is for Zone 5 people.  Lower zones will bump all of this back at least two to three weeks. In the case of warmer climates you could be gardening already (For my readers in Malaysia - Wow you probably garden tomatoes all year?)

NOW:  Water all trees and shrubs.   Slow soak as soon as possible whenever weather permits.

February 1-15   Dormant fruit tree spray.  Get good coverage top to bottom and around the entire tree.  Apply according to the directions on the label.

February 7-20  Phosphorus application.
http://ediblelandscapeblog.blogspot.com/2010/02/time-to-fertilize-your-fruit-trees.html

February 20-March 5   Fruit tree prune.  Each tree has it's own needs.  Here are two articles to help with some guidelines and instructions on how to prune:  http://ediblelandscapeblog.blogspot.com/2010/03/open-bowl-peach-trees.html

Cherries and Pears just need to be opened up so that air will penetrate the canopy.  Take out about one third of the inner branches.

March 1  Water all trees and shrubs.  Water Bamboos if you have them.

March 1-15 Dunk mushroom logs.  Soak in a large bucket thirty minutes minimum per end.

March 15-22 Incorporate mulch into garden soil. Incorporate burn and return mix.  Incorporate dead leaf litter and whatever peat or coffee grounds you need for amendment.  Manure now if you use it.
http://ediblelandscapeblog.blogspot.com/2011/01/burn-and-return.html

March 22-30 Mulch coffee grounds around berries and brambles.  Renovate berries and brambles.
http://ediblelandscapeblog.blogspot.com/2010/03/renovating-brambles-and-berries.html

April  1-15 Prep garden beds and plant cold weather species.  If you live in a zone higher than 5 you should be pretty much all planted and gardening fully.

May 28 booty sock young set fruit.
http://ediblelandscapeblog.blogspot.com/2011/01/booty-sock-bounty.html

If you have any additions or ideas please feel free to add them in the comments below.

Food security and beauty are an excellent mix.


Saturday, January 22, 2011

Burn and Return.

I have a large fire pit that is used as an integral part of my yard renewal.  My fire pit is pictured here:


This fire pit was hand welded by myself about two years ago.  The Chinese symbols for longevity, and wisdom coupled with the knots at the ends of the fire pit tie together the elements from my front yard including the engraved granite seasons patio and my sunset gold bamboo.  The fire pit is about ten feet long and fifteen inches across at the top and is supported by a single iron strut embedded in a four foot deep hole incased with concrete.  This allows the pit to 'float' above my patio at a height of about six inches eliminating tripping hazards and giving it a very cool look.  It is very heavy duty constructed of 8 ga. steel and is able to support an entire cut log or about fifty lbs. of charcoal.  Barbecuing meat can be done as well as open fire evenings on the patio in early spring or late fall with the pit warming the entire patio. 

I burn most of my dead and dry material from my yard in this pit.  I burn pruned tree branches, rose stalks, leaf litter, and even dog bones that my pet has finished.  

The ash from this pit is a rich source of minerals - mainly phosphorus - essential for my garden spaces.  But if I directly apply this to my soil I will drastically increase the alkalinity which creates a different problem.  

The solution:  Burn and Return

Collect your ashes into five gallon buckets.  

This next part is for those of you who are not squeamish.....

Pee on them.  Pee on them fifteen to twenty times per batch.  

The uric acid will balance the harsh alkaloids and the nitrogen in human urine will bind nicely into the ash completing it as a high potency fertilizer.  

After this process has been completed you will want to mix this concoction 5-1 with a compost or with your coffee grounds.  

Let this sit for about two weeks then mix into your garden beds especially around the tomatoes.    The nitrogen will support plant growth and because it is bound in the ash it will release more slowly and last longer than a chemical fertilizer.  The phosphorus will boost blossoms and encourage large crops.  

Try 'Burn and Return' and let me know what you think. 


P.S. If you would like a custom fire pit I would be willing to ship just about anywhere in the world!  Just let me know what you are thinking and if I can help I would be glad to make you one.  Compensation would depend on what you want and how long it would take me to make it. 

Tuesday, January 18, 2011

Booty Sock Bounty

The battle against codling moth and other fruit boring, chomping, egg-laying and otherwise destructive insects leads people to do some pretty extreme things including spraying pesticides repeatedly throughout the summer disrupting the predator/prey balance, and introducing chemicals into a gardeners personal food supply. If you choose to use hormone traps and spray once this works well with one problem......if your timing is off.

I have a solution for all larger fruit which recycles a readily available resource and will protect your apples, pears, plumbs, peaches, quinces and all other tree fruits from the ravages of insects.


The answer:  Booty Socks

The booty sock is the little sock that shoe stores provide to their customers for trying on shoes.  They are disposable and are thus thrown away - by the hundreds - every day. 

Just like the rules for coffee grounds you want to start setting up your supply now in preparation for spring.  When dealing with booty sock suppliers also use discretion and be polite. I have had some store managers who don't get it and react almost violently to my asking (they probably suspect some nefarious purpose.  Like I could even pull on of those things over my head to hold up a convenience store!)

After acquiring several hundred wash them all at once using a sterilizing laundry soap. 

You will need:

one booty sock per fruit per tree
one orthodontic braces rubber band per booty sock

Slip the rubber band over the young fruit just after it has set.  Slide the booty sock over the fruit next then roll the sock into the rubber band to create a firm roll-up seal.  The result is an expanding fine mesh net that keeps the moths from laying eggs and allows the fruit enough sun and air circulation to develop properly.

No chemical spraying or expensive traps or extension agents necessary. 

Best of all it's FREE!

Saturday, January 15, 2011

Drifting Through Winter

When planning layout and design for the placement of a landscape in a zone where winter brings wind and snow it is possible to make your winter easier by saving  time and effort shoveling and have the added benefit of directing moisture directly to the plants that need them  through what I call "perennial drift control".

In order to understand the basics of how this system works it might be helpful for me to define a few terms and explain how snow drifts.  Some people will find that they may have never paid much attention to the details of exactly how snow drifts but with a little practice and an understanding of some aerodynamic principles you will be able to create your own solutions for drifting snow so that this valuable water resource is used to it's highest potential.


The first two important terms are "windward," and "leeward."  Those of you who have sailed before will know these words well, but let me go ahead and give the brief explanation.  Windward is the word used to designate the side of an object that is facing directly into the oncoming wind as illustrated below.  This will change depending on the direction of wind in your location but here in Greeley the wind almost always is a westerly (originating in the west blowing toward the east).  This piece of information is very important to observe and to gather data on because this is how you will build your perennial drift control.


Leeward is the term used to designate the side of an object shielded from the wind.  In the above drawing the leeward side of a wall creates a pocket of slower more turbulent air.


My yard has a very peculiar orientation in relation to the average direction of incoming winds.  The neighborhood is aligned in a  way that westerly winds blow directly down the street in the front of my house and are funneled into MY front yard which sits at a bend in the road.  This bend has the effect of creating wind vertices that my son lovingly refers to as the "trash vortex".  What essentially happens is that all debris picked up from civilization West of my home gets swept down the funnel into a swirling turbulence of winds that place the materials directly into my NE window well.  I am not exaggerating when I tell you that I have had the pleasure of cleaning everything from unopened mail to a child's plastic swimming pool from my NE window well (the wind actually folded it and crammed it down into the window well cavity.)

What is it that makes the Trash Vortex relevant to drift control?  Well the very same effect that carries trash into my window well also carries vast quantities of snow into my driveway, yard, and yes...window well. The solution lies in not stopping snow but instead creating a drift that is where we want it to use the moisture from the snow where it is needed and to leave pathways, driveways, gates, and doors as clear as possible from snow drifts.

This strategy actually assists with a more natural aesthetic placement of plants.  The result is a beautiful yard however, the placement of that new serviceberry will not be in a Victorian style hedgerow.  What you will have is a naturalized space with good use of a three story layering which makes shoveling easier and your trees healthier.

The first step is to notice where snow already drifts in your yard and make an evaluation of whether the drifts are:
1. In the way.
2. Currently the result of another plant initiating the drift.
3. Providing moisture to a perennial.
4. Causing structural concerns to a home, barn, shed, open garage.
5. A high drift settling in from the top of a hill, mountain, or building.


In the case of the fifth descriptor, there is really nothing that can be done to redirect the snow. The snow is slowing as the wind is blocked by the object such as a building and will inevitably settle in these spots.  This problem will create a heavier build up and a dome shaped drift in the leeward side of the object. Look at the illustration below.  This situation can be used to your advantage by planting a deciduous perennial (fruiting) shrub or tree square in the middle of where the drift occurs.  The result is that melting snow will provide slow soak moisture to the perennial. The amount of moisture will be roughly about one inch of water for every ten inches of snow depth.


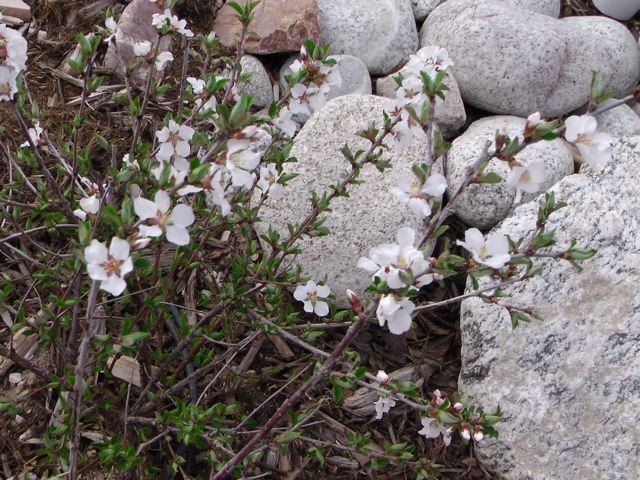
In the case of the first and fourth descriptors you will want to prioritize your next plantings to fix the problem.  A drift that crosses a sidewalk or driveway can be greatly reduced by planting low growing dense hedges or shrubs such as Nanking Cherry or a Hazelnut bush windward of the path or  structure to slow the driving snow so that the drift shadows the shrubs instead of advancing onto the pathway.  Cold hardy clumps of bamboo can augment the shrubbery as well as pampas grasses.  The grasses are not edible but make good companion plants for the edible shrubs if planted windward of them to reduce dessication from driving winter winds.  These can also be used to cause drifting before the wind drives snow against a structure.


One of the most interesting uses of perennial drift control is to direct moisture where it is needed.  Causing large piles of snow to accumulate at the leaf-line of a tree or pile up around fruiting shrubs is actually a pretty easy process and can be accomplished in a variety of creative ways. Primarily what you want to do is to slow the air.  Use perennial fruiting shrubs, and strategically placed boulders.  Place them on the windward side of the place that you want drifting to occur.  The only other consideration is distance.  Remember that the distance should allow for the snow to build up in a place that stores snow for use as it melts.

This technique requires some long term observation and perhaps pictures or note taking as the winter months happen.  If you consider your placement with this variable in mind you will save time, money and plants next winter.

Tuesday, January 4, 2011

Starbucks Symbiosis for Garden Greenery

Why should you be going to you local coffee shop?  Well, beyond the need for a caffeinated hot beverage to ward off winter chill, you should be going for the FREE coffee grounds to perk up your garden.

Why use coffee grounds?  Because they are rich in Nitrogen, they acidify soil (essential in Colorado where the soil and water are so basic that blueberries cannot thrive without serious amendment), they encourage worm migration into the area being mulched, they add organic matter to the soil, they are pre-shredded, as mulch they look great, and best of all they are FREE!

Map out a route to collect from multiple coffee shops in a single day to make the trip economically beneficial.  My route is planned so that I add no extra distance to my after work pick up the kids and head home circuit that happens at the end of the day.  In this modified course I am able to visit seven coffee houses (five of which are Starbucks).  You will need to retrain your baristas to save the grounds and to double bag them for you and this may take a week or so of consistent visits but they will be happy to let you have what you need if you are kind, polite and discreet.  (don't shout "THANKS FOR THE GROUNDS!!" while slinging a leaky bag over your shoulder and heading out)

Why now in the winter time??? This is the most obvious question that I am asked by the coffee house employees.  The answer is more subtle than "got nothin better to do..."  In fact the grounds can be applied to areas when the snow is melted and the freeze/thaw cycles will help to start incorporating and breaking down the particles into the soil amending it naturally and prepping it for the upcoming season.  If your ground is completely coated in snow then save the bags by stacking them in a corner.  They will freeze and keep nicely until the thaw giving you time to accumulate enough to mulch with. 

This brings us to the question: How much do you need?  This varies depending on many variables but I have found that a nice sized bag with about twenty lbs of wet grounds will mulch about two square feet to a depth of an inch and a half.  This means that I will need to collect six such bags every day for the following month or so in order to mulch my strawberry beds, around my hardy kiwi, in my blueberry containers, and in the annual beds in the front of my house.  (about two cubic yards)

Berry plants of most any variety prefer neutral to slightly acidic soil even those that are tolerant of more basic soil types and low growing berries such as strawberries, emerald carpet, wintergreen, and cranberries additionally benefit from the fact that slugs hate the coarseness and caffeine compounds in the coffee grounds.

They can be used to 'green' up your compost pile in a fall build up of brown carbon materials, and they replenish many trace minerals into the soil as they decay.  Some people like to add water to the grounds in a bucket and let them steep for about a day and then pour the phase II coffee  directly onto the plants such as fruit trees for a gentle nitrogen boost.  I have found that more than anything this technique neutralizes the alkalinity of my water before giving it to sensitive plants such as blueberries.

Where not to use them? Use them sparingly in your general raised beds or anywhere the plants prefer an alkaline soil.  Cabbages, broccoli, and other leafy cool weather greens do not like the acidity.  If using them as mulch like I am I have heard that some people like to add dry crushed leaves to break up the tendency of the grounds to cake up and form a crust.  (I don't worry about this as it helps with weed control.)

Even if you don't drink coffee, remember that this is an excellent resource that will become landfill if not leveraged for your own use in the garden.

Monday, January 3, 2011

Micro Climates

The past ten days have delivered a cold spell here in Greeley which have allowed me to conduct a study of my yard in the infra-red spectrum.  I have been venturing out with a laser point infrared thermometer and measuring the temperatures of key areas in my landscape during the daily light cycle during the shortest days of the season in order to find out exactly what climates are present.  I recorded the temperatures on south facing walls, near the foundation, and on the north side of the property in the shade in order to start understanding my property in greater detail.

This is what I learned:

1.  I have several micro-climates that will maintain a soil temperature of 25 degrees F even during -2 F night temps.

2.  There are some places around my foundation which supported live red onions all of the way until the 27th of December.  This was possible despite 20 degree temperatures and severe winds.

3.  The thermal mass from a south facing wall in my back yard is sufficient to warm nearby soil to melt snow even into the evening during sustained cold temperatures below 20 F.

So, what do I plan to do with this knowledge?  I want to run an experiment with a Fig tree in the warmest micro-climate.  I believe that it might take as much as three years to get to the point where it will yield however, I am patient and the addition of figs to my edible landscape will be fantastic!!

You could do a similar experiment with an infrared thermometer. There is still time in the dark winter season to find the temperature differentials of the micro-climates in your outdoor space.  You might find miniature zones as much as two gradients higher lurking somewhere that could be used to plant that exotic that no-one knew was possible.

Monday, August 2, 2010

I am back from boot camp and the yard looks great!!

First I would like to thank my loyal readers for not deleting me during my summer absence.

The U.S. Army honored me with an opportunity to take part in boot camp this summer where I immersed myself in the army culture and lost about twelve pounds.   My edible yard was left in the capable hands of my ten year old son Quinton and my wife Shona.  The Greeley Master Gardeners placed my yard on the tour this year and I was conspicuously no where to be found on the day of the tour.  My family and friends spent the week before the show trimming, mowing and pulling weeds in order to get the place presentable. I received text messages updating me about the comments and questions from visitors (more than two hundred) who walked through my yard that day.

I cannot describe the anxiety that was fostered by being away and unable to control any variables relating to the success or failure of presenting my message (through my yard) to hundreds of strangers there to scrutinize my plants, my design, my ideas.  In short nothing less than my artistic integrity was on the line.  I don't think that I am exaggerating when I say this.  Greeley tends to be a place where people judge and remember your every public appearance and they tend to relay stories so that they spread and stick like hot honey on mini toast.  I was very nervous with those annoying questions that populate your thoughts only when there is absolutely no way you could do anything about it anyway.

Did I program the drip timer adequately to compensate for the increasing day length and temperatures?
Do the boys know all of the plants?
What if someone needs specifics information?

What if?

I had a very generous reader who volunteered to continue the blog in my leave but I was unable to coordinate this with her and I hope that her feelings were not hurt.  I had very limited access to internet and the outside world at Fort Sill.  I really appreciated the offer though.  I liked the idea.  Maybe next time.

Back to the show and my yard.

I was nervous but that night my wife, my dad, and the local nursery owner all left messages on my cell phone letting me know that the show was excellent.  I felt so proud of my family.  My sons gave the tours.  Shona had prepared the vegetable gardens and had painted the front yard with exotic red lettuces and black pearl basil.  Feedback was so positive in fact that the local paper was at my house three days after my return to do a feature on my edible landscape complete with pictures and further promotion of my message.

This experience proved something profound to me though.  One of the biggest reasons that people have lackluster outdoor spaces is because they don't want to care for fruit trees, or cultivate a garden, or plant seeds, harvest, put food up, or quest for self sufficiency.  Perhaps if properly done an edible landscape can be  mostly hands free.  Perhaps the key to having a yard that can be managed is in the design.

My space utilizes drip on every plant including the vegetable gardens and the hanging plants.  This eliminates the need for hand watering.  My design concepts include a philosophy of "right of way"  - let me explain.

Strawberries, blackberries, and raspberries have the right of way.  If they spread into lawn areas the grass is eliminated and the berries get the space. I adjust to accommodate the increased yield of fresh berries.  This allows my landscape design to flex and change to suit the needs of the plants.

Right of Way saves me the frustration of attempting to control plants that I planted because they were aggressive and tenacious in the first place. Adopting this philosophy saves time and increases success in the edible landscape.

The orchard is allowed summer growth without pruning.  I prune in winter to open the canopy of the tree without stunting growth.   Winter pruning invigorates the tree and encourages growth and fruit production.  Pruning in the winter frees me from heat of the summer work.

Planting companion plants that control pests reduces the need for chemical sprays.

I started my yard with a foundation of planters mix for a minimum of 12" of topsoil enriched with compost and organics and thus the plants do not have a need for fertilizers. Once again this detail at the very beginning reduces the maintenance.

In summary I think that the lessons learned from my hiatus are related to the initial design and early planning.  Retrofitting a landscape may actually create some new work and maintenance requiring the person taking a leap forward toward self sufficiency to make the commitment and follow through.  If you have the luxury like I did to start from the ground up I would really pay attention to the foundation first.  Bring in enough top soil and install all of the irrigation for every plant including those still in the catalog before you plant your first seed.

Your landscape will pay you back someday - maybe while you are doing pushups in Oklahoma.

Monday, May 31, 2010

Spring so far.

Spring is here and I have been absolutely slammed trying to get the yard ready for show, finish school responsibilities and I leave in exactly two weeks for the Army Warrior Transition Course for six weeks leaving my yard in the capable hands of my ten year old son Quinton.

My progress has been good.  I have added another 320 square foot of garden space by adding another level of terraces matching the western beds. Shona and I prepped the beds and she has now planted most everything veggie wise for the upcoming season.  We are going heavy on the green beans this year hoping to be able to can at least sixty quarts to last the winter.  I added some new trellises on the fence for the pole beans.  I custom made these from 1200 lb stainless steel cable coated in 200 mil black nylon.  This is the same stuff I use for my espalier and it works really nice as it is very gentle on the plants and very durable.  I added two more bench storage seats and two large planter boxes that hold a yard of material apiece.  These I filled 50/50 with Happy Life Garden's ultimate planter mix which contains the leftover mulch materials from the Budwieser plant with half peat moss so that I could plant my two brand new Patriot Blueberry shrubs. These will hopefully provide a good amount of fruit next year.

I have added a guomi berry, two autumn olives, twenty thimble berries, twenty salmon berries, and a high-bush cranberry seedling.  I additionally have added a few rubarb plants gifted to me by Jason (thank you Jason). He also gave me some of his raspberry plants to add some genetic diversity to the measly four cultivars that I already had.  I planted some Jerusaelem artichoke and two yellowhorn trees. I believe that these will be nice for the food as well as the flowers when they mature and get established.

On the western shady side of my house I have added a few new experiments.  I planted some bunchberry - en.wikipedia.org/wiki/Bunchberry  
These should prove to be very cool if they survive.  I also planted wintergreen, and an orange spice creeping thyme which smells fantastic.  


I dove into some mycoculture and have made about twenty mushroom logs including some pearl oyster and lion's mane.  I have placed these next to the royal ferns which I am hoping will get big enough that eventually I will be able to harvest fiddle-heads.  


Finally I have added a clump of sunset glow bamboo under a drain spout on the west side of the house.  I would love to see this get big.  I like bamboo shoots and the canes would be very useful in making trellises later.  


Up next: iron trellis for the Kiwi. more benches, and pictures for the blog.  What a couple of weeks.......hah.

Wednesday, March 31, 2010

Finding Space

I have recently run into a problem that had been perplexing me for the past month.  I have been running short on additional space for annual vegetables and fruits.  Because of the rotation I will not have as much room for tomatoes this year and I want to have more broccoli and cauliflower as well as trying some new varieties of watermelon and cantaloupe.

I have a plan.

I am going to build three new vegetable plots, create a few raised beds, build some planter boxes and perhaps rent space in a community garden. This sounds simple but the result of this plan is that I now have to rip out a few large sections of my yard.

I will be exchanging lawn for vegetables.

This is the entire point of edible landscaping and so the time and effort will be worth it.  I will expound on each of my little projects in detail on further blog posts.

In the mean time start looking in your yard for spaces that could be converted!!

Tuesday, March 23, 2010

Renovating brambles and berries.

If you did not renovate your strawberries and brambles during the fall there is still time to do so.  The process is simple and will help the fruit stay clean and keep canes and rhizomes healthy.  In this blog I will cover how to renovate both strawberry beds as well as raspberry and blackberry bramble patches.

The bulk of the work in the strawberry patch is in the cleaning up of detritus and last years leaves.  The bed should then be given a high phosphorus fertilizer with a 1-2 nitrogen to phosphorus ratio something like a 15-30-X fertilizer would be correct for this application.  the "X" is the potassium content and although potassium is essential for plant metabolic function this number is not as critical as the nitrogen or phosphorus. Don't worry about getting it on the green leaves that are still up from the last season because you are going to trim these off collect them and then mulch the bed with cedar or dry straw.  The new plants will push their way through the mulch and the application of fertilizer will help the plants set blossoms and fruit.  The reason for the mulch comes later in the season when you don't want your berries sitting on wet soil.

The raspberry and blackberry patches are a little more involved.  If you have not already done so you need to build a two wire trellis supported by stakes above the brambles.  The trellis should be about five feet high at the top and the middle wire at about three feet. When I first planted my beds I did not think that I needed to do this as my brambles were against a fence. I was wrong.  The process of tying the brambles up to strings fastened to the fence was a big pain in the neck and I quickly learned my lesson.  If you need a more attractive solution try using plastic coated wire and bamboo so that the trellis looks nice and the bamboo blends in with the mature canes.  The brambles are then fastened to the wires so that the trail along the wires horizontally.  The brambles that don't reach the wires or new shoots can be fastened to taller shoots at diagonals.  Then you will need to take pruning sheers and clean off all old leaves and stems from the previous year. Rake and clean the detritus from the bed and apply a general purpose fertilizer like 10-10-10.  Canes that break off during this process can be cut at an angle like you would cut a flower for a vase. Dip the cut end of the cane in rooting hormone and stick it into the ground and voila you have another plant.

Wednesday, March 10, 2010

Monoculture and the American Table

Monocultural farming techniques helped to create successful civilizations throughout history.  The beginnings of  single crop agriculture are associated with increased population and the ability to produce more food with fewer hours of labor allowing surplus for storage and to process large quantities of  baked goods, beer and wine.  However, monocultural farms do have serious disadvantages, and have many cautionary examples that show exactly how growing a single favored crop leaves a civilization vulnerable to compromised food supply.  Growing a singular genetic stock in a sight specific manner has lead to instances of crop loss due to blight, drought, flood, or infestation and our modern hubris derived from a much better scientific understanding of botany and genetics does not make us immune from the potential consequences of single crop agricultural practice.  I support science and do not have any health concerns over consuming genetically modified foods.  I do however have many concerns over patented genetic seed stock and the vulnerability of our food supply to the ever adapting food crop pests.  Evolution never sleeps.

My biggest concern is the limited dietary selection that will inevitably result from a focus on the shelf life, shippability, and consumer taste demands on the determination of which crops should be grown.  Although these considerations are all valid and important considerations to the agribusinessman there needs to be a way for the average person to grow and deliver varieties of produce the family table.  The most viable way to do this in my opinion is to adopt a philosophy of maximizing the productivity of ones own micro-agricultural spaces.

Biodiversify  your own space and protect yourself against the inevitable problems of large scale single crop farming.

Monday, March 8, 2010

Biodiversity and the Edible Landscape

Many home gardeners limit their crops to maybe a few tomato plants and perhaps some strawberries or a small herb garden.  Although this is a great start I would encourage these gardeners to look for more opportunities to replace purely decorative plants with varieties of plants that bring nutrition and sustenance and the benefits of reduced trips to the store to purchase produce.

A very good way to do this is to look at the landscape like a landscaper. Divide the yard into three stories.  The floor is the story of the landscape that includes ground covers, ferns, mosses and low growing plants.  The second story of the home landscape is the overgrowth which includes shrubs, large plants, vines and brambles. The canopy is the final story of the landscape.  This story is basically trees.

When a gardener walks out into their green spaces they should look for opportunities to include plants that fill all three of these levels in order to create a design that looks natural.  This type of planning is effective because it surrounds the observer in vegetation transporting them away from the hard urban forms that compose most of the scenery throughout their day. This aesthetic is also functional as it allows the gardener to create a microclimate with placement opportunities for greater varieties of plants.

This use of space will automatically increase your biodiversity because you are seeking out plants that produce nutrition and that fill a role within your design.  Tucking in an extra few strawberry plants between the rock retaining wall and the pathway below it or placing an espaliered apple tree against a garden shed are examples of such planning.

Considerations:


Be aware of shadows cast by trees. When planting your dwarf orchard be aware of the canopy and it's shade.  Get a twelve foot piece of PVC and hold it vertically where you plan on planting your tree.  Observe where the end of the shadow falls.  Repeat this process throughout a single day morning, noon and night.  Record your results and then do this day pattern over a four month summer period starting in April.  I know that this puts planting that orchard off for a year but careful observation and planting will allow you to take advantage of every square inch of your usable space.

Every safety railing or piece of wrought iron is a trellis.  View every piece of decorative iron and every safety railing as an opportunity to support a grape, kiwi, or pole bean.  Do not underestimate the value of these ready made supports in creating food opportunities.

Find edible flowers. Edible landscapes can include amazing flowers and spring displays.  Day-lilies, Jerusalem Artichoke, Cherry tree blossoms, Sunflowers, Cone Flower, Roses, Arugula, Lavender, Nasturtiums, Marigolds,  Crocus  for harvesting saffron, Clover, Bachelors Buttons, and the controversial dandelion are all edible and add color to the garden.

Consider insect diversity. Bees offer good pollination and honey. Lady bugs and Lady birds control harmful insects as do mantis, mud daubers, wasps, masons bees, lacewings, predatory mites, mealy bug destroyer, and beneficial nematodes.  Some of these can be introduced into your gardens and landscapes and will self sustain offering years of protection.

Be willing to experiment. Cold hardiness zones and soil types are guidelines that should receive some consideration.  However, testing a sample plant now and then might yield unexpected results and opportunities for greater diversity.  Try new and unusual varieties of annual vegetables as well as trees and shrubs.  Be willing to accept some losses and test the boundaries of commonly accepted local gardening advice.

Consider Dioecious Fruit Trees. Instead of using self pollinators consider the two variety option where there is room to do so.  This practice forces the gardener to increase the biodiversity and resilience of their garden. It may be necessary to graft additional varieties onto existing trees where space is limited in order to gain the same benefits.

Look at plant limitations as opportunities. Instead of looking at a label or planting guidelines as a limitation change your thinking into the question: "Where would this work in my garden?" this simple shift in thinking can reveal ways of filling up those nooks and crannies of unused space and increase your yield.

Research, Research, Research. I find new and interesting plants everyday that I am ready to add to my edible landscape and I encourage readers of my blog to share what they know with me or anybody else I enjoy learning everything I can about new edible varieties that will survive in my climate.

Tuesday, March 2, 2010

Virtual seed swap

The past few days have been a great source of amusement as my facebook lights up with messages concerning the first annual seed swap on the "an honest to god gardening group" FB page.

http://www.facebook.com/board.php?uid=2216893182

 I created two forums one for a seed swap and the other for a scion exchange.  A few of the over three thousand members of the group have decided to participate and the number of plants made available were also slim pickins but somehow I managed to find a very nice scion exchange to get some grape vine starters which will fit well trained over my walls next to the flagstone patio on a south facing wall.  These will be very nice.

I was still very excited about the exchanges though as they have stirred my imagination with the possibility of virtual seed and scion exchanges that could provide diversity to the edible landscape.  Even in a small urban setting a diversity of productive plants is necessary if you want to insure bounty in the fall.  My yard is a 1/8th acre plot.  On this I have planted:
Kristin Cherry
Lapins Cherry
Nanking Cherry (2 different cultivars)
Black Currant
Red Currant
All In One Hardy Sweet Almond
Allenia Hardy Sweet Almond
Daylillies
Service Berries (4 different cultivars)
Blackberries (5 different cultivars)
Strawberries (2 different cultivars)
Sweet Basil
Bush Basil
Meader Persimmon
Aronia Berry (3 different cultivars)
Taylor Paw Paw
Sunflower Paw Paw
Bartlett Pear
Mulberry
Gooseberry (4 different cultivars)
Hardy Kiwi (2 different cultivars)
Grapes (3 different cultivars soon to be 4)
Honeyberry (2 different cultivars)
Superior Plum
Methley Plum
Granny Smith Apple
Golden Delicious Apple
Reliance Peach
Apricot
Pluot
Red Raspberry
Golden Raspberry
Black Raspberry
Goji Berry
Cranberry
and about one thousand square feet of vegetable garden space with the usual suspects strategically placed including tomatoes, peppers, green beans, watermelon, cantaloupe, broccoli, carrots, beets, onions, egg plant,  lettuce, and various herbs.
Bees

I will continue to build on the diversity which I see as a good start but not really good enough yet.  I would still like to see some more edible plants despite my already highly unusual variety of edible plants.  I would encourage gardeners to consider the possibility of increasing the biodiversity in your own landscape.

I think that the logical extension of this concept is the online seed swap/scion exchange and perhaps a perennial trade.  Think about the possibilities!

Monday, March 1, 2010

Open bowl peach trees.

This week pruning peach trees is on my schedule. I would like to offer my advice on this even though my trees are somewhat different than the standard orchard tree. One of my peaches is espaliered the other is being grown as a spindle in order to save space, so neither is an ideal peach.

The ideal peach is pruned into an "open bowl." the concept is that up to four or five main branches are selected that are stemming out at a similar height. These branches would hold a bowl like fingers without the main leader of the tree. What I am going to say next is going to freak you out if you have never done this before so brace yourselves.

You need to take everything above these branches out. Now remove any branches that cross. What you have left is the "open bowl"  This might seem very extreme, but to produce quality fruit you will need to prune the tree back hard.  The tree will put its energy into these branches and the fruit. Pruning the tree will strengthen the branches and increasing the productivity of the tree. The late summer will produce new growth and next February/March you will need to repeat this process.

During the late summer you can prune to promote dwarfing of the tree.  At this time you could also "head" the branches by pruning them at the end back to a smaller stem that has a nice angle that you like (30-45 degrees)

Sunday, February 28, 2010

Getting ready for the Garden Tour

I had the pleasure today of attending a tea.  I am not normally the type to get invited to a tea.  But here I was surrounded by a group of very nice and very sophisticated gardeners all sipping from expensive china and snacking on little sandwiches without crusts and eating those delicious little finger foods that had been frosted or dipped in chocolate. I of course had some tea and let me tell you it was very good.

The purpose of this tea was to discuss the upcoming Greeley Garden Tour an event which the very name of which I have to admit stresses me out a little. The idea here is that a committee of experienced master gardeners select a group of about a dozen homes in the city of Greeley with outstanding or unique gardens in order to showcase them and to raise money for a scholarship for nursing students. Needless to say they invited me to this tea because I have been selected, screened and approved for this honor.

I was amazed at how real gardeners share so many of my values. They were excited to have my weird ideas about productive and intensive produce plantings shown alongside the traditional flower gardens prevalent in this area. They were excited about the varieties of plants and my experiments.  I described a few of my specimen plants including my persimmon and almond trees without criticism or the raised eyebrow that usually stares back at me when I usually describe my yard.  A group of open minded people excited about plants.
This just might be the definition of gardener.

My stress comes from the reality that on the last weekend of June over 350 people will be walking through my yard!  I have so much to do.  I really need to address finishing the cedar benches for the west side of the house where people will walk to return to the front of the house. I need to plant the ground cover of creeping strawberries or emerald raspberries in the stone pathway.  I need to make repairs to the flagstone patio, I still need to turn the garden and clean up the strawberry patches.

As every gardner knows - when it rains it pours!

Friday, February 26, 2010

About Bare Root Stock

I have heard many people bad mouth "mail order" or bare root plant materials over the years but I believe that they have their place and if properly planted and cared for can actually have some advantages.

The first thing that you will need to know is that now is the time to order the bare root plants.  Do not wait until late spring because the nurseries will have already sold their plants and if nothing else varieties will be very limited.  Most good nurseries have been around for enough years to make good estimates on the number plants that they will need to sell and this fact means that you need to plan ahead if you want to take advantage of this kind of plant shopping.

The bare root tree, shrub or bramble arrives in a cardboard box wrapped in a plastic bag with some moist paper towels loosely wrapped around the roots.  The stock is usually dormant and may have a rubber band securing the bag around the trunk to keep the moisture in the bag.  It is best to coordinate with a bare root nursery that specializes in this type of plant material and has a good track record.  The timing of the shipment is one of the main keys to success. Your lines of communication with the nursery will need to be open and a clear understanding of the weather in transit and the conditions where you are will be essential for successful plants.

When the nursery ships your material you will need to go out that day and purchase liquid rooting hormone in a large container.  You will want a quart for every twenty or so plants you put into the ground. You will also need to go out and place markers for each of the plants exactly where you want to dig the holes.  I do not pre-dig the holes because I do not want to dry out the soil in the whole and digging the dirt the day the plants arrive one-by-one seems to work very, very well.

DO NOT BACK FILL THE HOLES WITH SOIL OTHER THAN WHAT CAME OUT OF THE HOLE THIS WILL CAUSE THE ROOTS OF THE PLANT TO BIND WHEN THEY ENCOUNTER THE BOUNDARY BETWEEN THE FANCY PLANTERS MIX THAT YOU PURCHASED AND REALITY!!


When the plants arrive, unpack them immediately and soak the roots in water deep enough to submerge the roots.  You will want to soak these plants for about 24 hours.  At this point, you will need to grab a sharp spade and one by one dig holes and plant the materials.

Grab the trunk of the tree or shrub so that the graft is just above the top of your fist.  Place your elbow on the edge of the hole so that the roots drop into the deepest portion of the hole.  If the roots touch or bend at all you need to dig deeper.  When the roots no longer touch after adjusting the hole then you will begin immediately pushing the dirt from the tailings into and around the roots gently without compacting.  When the hole is full the graft should be one fist (@ 4" above the ground.

Water the plant heavily and mix a one gallon bucket to the specifications listed on the label.  Each plant gets one gallon of mixed rooting hormone.

At this point you will need to protect the plant from deer, rabbits and dogs.  But if you can do this you will succeed and that is definitely the point of gardening - success!